Wednesday, 17 May 2017

Mandala Madness Part 1

Whilst I am still enjoying sewing and have the next few projects sorted out in my head, I have got back into doing some crochet. I was given a "ball" of wool for my birthday a couple of weeks ago. I can't pronounce the name of it, Scheepjes, but I love how the colours blend beautifully as you progress further into your project. The colour combo that I am working with is called Popin Candy.

I knew straight away what I wanted to do with it. I had seen on a Facebook page a CAL (crochet a long) called Mandala madness by Helen Shrimpton. I found the pattern listed on Ravelry and the link took me to her website Crystals and Crochet. I am a beginner still when it comes to crochet. I have been able to do granny squares but have been trying to learn different stitches and how to follow a pattern. So far I have managed to crochet 2 cats, a hat and several flowers. This is something completely new and different. I wasn't too sure how I would go.

The website has really good picture (alongside written as well) instructions that I am mostly competent enough to follow. It also has a link to videos of each part. The pattern was released in 18 parts over time in 2016. I must confess, I did start off by using the picture instructions but used the you tube videos of stitches/sections that I wasn't too sure about.

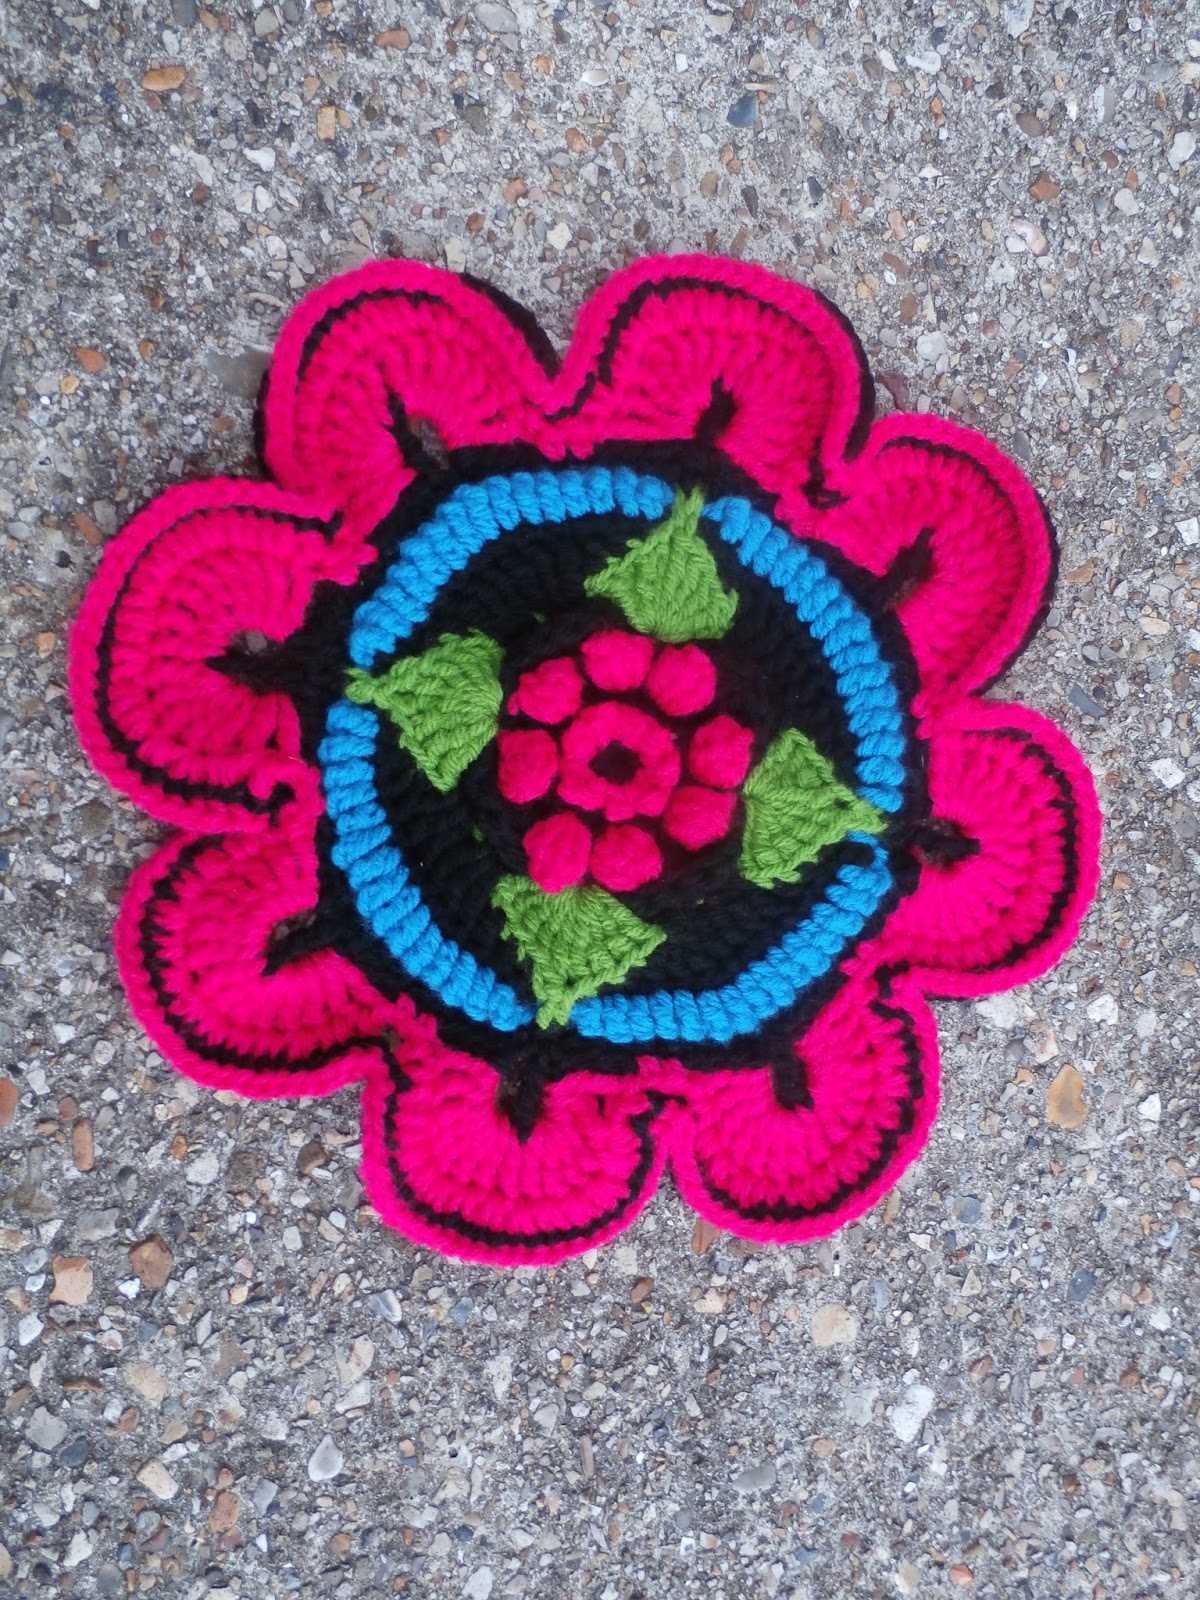
Not content with starting one I decided to start a second one. This time I thought I would use stylecraft with black being my base colour and cerise, apple green and turquoise as my accent colours. I am using a size 4mm hook with the double knit wool as opposed to the 3mm for my other one. They are coming up different in size and I am trying to complete a round on one and then repeat the same round on the other one. I already even at this early stage have plans for different colourways as it is such an addictive pattern!

Right. Part one is complete. Lets start part two :)


Sunday, 7 May 2017

Steampunk shorts

I decided my next challenge would be to make myself a pair of shorts. I have never made anything like this before. The closest I have been to stitching shorts was to repair my lads trousers (many times) when they were little as they often came home with the knees out and the crotch split open from playing football.

The pattern I am using is Simple sew, The Shannon collection, with black cotton drill as my fabric choice.

After cutting out the fabric, which was fairly straight forward, the next step was to put in the darts. I have done darts several times before so this was pretty straight forward. Once these were done I had to tackle the pockets. I have done pockets that are inserted into the side seams once before, on the skirt on a previous blog post, but not like the ones on this pattern. The process s pretty straight forward. It is just making sure that you have the right pattern pieces and that the undersewing is nice and neat.


The waistband is made in three separate sections in the front and one piece for the back. These are then doubled up to make the double thickness. A bit fiddly but not too bad. Once this was done it was on to the invisible zip. I have done zips before but never an invisible one. You tube however was my friend and after doing some research onto how to get the neatest finish it was time to put it into practice. Although it looks really tricky, it is more straightforward than it looks and I am really pleased with my first go.
I am really pleased with the result and will probably feel confident to do more invisible zips in the future. The only bit left to do now is to sew up the remaining seam, sew the legs and hem the bottoms. This was very straightforward and was really quick to do. The pattern states that the buttons are for decorative purposes only so no need to measure out and do button holes. Rather than ordinary buttons I wanted something a bit different. I found some Steampunk inspired octopus buttons in a local shop that I thought would be perfect. They had a shank on the back which I didn't want so this was cut off and invisible thread was used to attach them, using the tentacles as a fixing point as they had no holes. I am really pleased with the finished result and will definitely be making these again. The pattern is very straight forward to follow, with enough challenge for me to extend my skills. I enjoyed making them and already have several ideas on how to adapt them next time!


Tuesday, 18 April 2017

Mistakes - To unpick or not to unpick?

Mistakes, we all make them at some point or other but what do you do when you find out you have made a mistake. Do you reach for the unpick or do you just live with it?

I guess there is no one answer as it can depend on what you are making, who you are making it for and what material you might be using. I have recently finished knitting a long line cardigan to wear at work in teal coloured Stylecraft wool that I was given for Christmas. I love using this brand of wool as it knits up really well, is soft and has good washing care. I was really pleased with the finished results once I had finished the knitting part. Always the most enjoyable part, but now had to sew it up which is something I don't particularly enjoy but is a necessity. The cardigan has a shawl collar which is great for the colder days and was the last part I had to attach to the main cardigan as it is part of the button band. I had just finished stitching it down when I realised that I had not used the ladder stitch I normally do on this part (this is the second version of this cardigan I have made) as it does not show as a seam when worn.

The dilemma. Do I unpick it and do it all over again, this time correctly? Or do I live with it as after all the cardigan is for me and realistically would anyone bar me notice?

In the end I decided not to do either but instead make it look like a deliberate feature. I also crochet and to join blocks together when making blankets I crochet them rather than sew. This gives a nice raised finish with a chain stitch. This I thought would give the obvious seam a decorative feature should anyone notice and looks as though it had always been done on purpose. I guess sometimes a mistake can be a blessing. Its how we deal with it that makes the difference.

Thursday, 6 April 2017

Pushing the boundaries - part 2


My two dressmaking challenges are now finally complete. I finished my skirt a couple of weeks ago and then set about making the sorbetto top. As I said before I found doing the bias binding edging the most tricky part. I have only done it once before and it went well that time. So typical! When I did it on my previous top I stitched it on the outside and then turned it onto the inside and stitched down. This gave a really neat crisp edge on the outside. This time I did it the other way. The crisp edge was on the inside and I ended up doing my top stitching twice as I really wasn't happy with it the first time. Still, its these things that we learn best from and give us the chance to keep on improving. My final touch was to add some diamante style gems. The dancing Mexican skeletons now have sparkly eyes. These were easy and straight forward to do as the gems have glue on the back then when heated up with the heat tool melts and sticks them to the fabric. I am really pleased with this effect.


I really like the apple buttons on my skirt. I think they finish it off with a splash of colour against the black and white.

https://blog.colettehq.com/news/free-pattern-to-download-the-sorbetto-tophttp://www.tillyandthebuttons.com/p/picnic-blanket-skirt.html
Links to the patterns that I was given as part of the challenge

Sunday, 2 April 2017

Pushing the boundaries

I have been doing lots of knitting lately. It is something that I find very relaxing and helps me deal with the stresses that we can face in daily life. Recently I have completed a black long length cardigan, a purple ombre with black stripes cardigan, a teal aran cable jacket and lots of mini hats for the Age UK innocent smoothie bottles (for when I wanted something quick and easy to do without thinking). I am also mostly through making a teal version of the long black cardigan.

As much as I like knitting and how it helps me unwind, I do also love my sewing. This can be relaxing but I need to think more in comparison. I have always loved to sew but like to do a range of different things, depending on what the mood takes me and how much time I have. Back in February I decided to join a dress making group where we met up to have a chat. It was a fairly new group having only been set up the previous month. As a teenager I liked to get clothes and change them to make them unique and more my style. Recently I have decided I would like to make clothes from patterns and try to alter them as I go to make them more me.

At the dressmaking meeting that I went to we were set a challenge of making either a sorbetto top (from a downloaded pattern) or a picnic skirt that was made from our measurements. I decided that I would have a go at the skirt as I had no way of printing out the pattern at the time. Having never made anything from scratch and with no paper pattern to pin and cut out the pieces from I found this quite a challenge. Was it going to fit me? Would I get the measurements right? I chose a really nice black cotton drill fabric with white spots. I decided that it needed a splash of colour so I found out some red bias binding from my stash to place along the seam line between the waistband and the skirt body. Having an idea and trying it out really pushed me. Luckily it worked out well. The final touch was to add some apple shape buttons down the front. It came out really well for a first attempt so will definitely be making another one. I also decided to give the top a go having been given a printed out copy of the pattern. This one was quicker to make and I do like the fabric that it has been made in. Mexican dancing skeletons! The binding around the neck and armholes is something I have only done once and is something that does push me as I want to get it perfect every time. I also want to work on the fit. As although it does fit me ok, I would like to alter it slightly so that it is perfect.

Having only used paper patterns recently, I thought that it would be the made to measure piece that I would find the most challenging and push the boundaries. However, I have found that using paper patterns the size does not always fit perfectly and its how you have to change and adapt rather than just going on the original measurements that you have taken. I am pleased with both but am surprised at how they my perceptions of how I would find making them to be the complete opposite!

I just need to photograph them now and upload.

Wednesday, 8 March 2017

UFO's

So....... I have been trying to get those projects that I have started, and then got side tracked and started a new one, finished. We all have them its just that I seem to have rather a lot of UFO's so it has been good to finally get a couple of them done.

My Mum managed to somehow persuade me to knit her a cable jacket in teal aran wool that she started but was finding the pattern a bit hard going and gave up twice. She is 82 so I can forgive her this. It was her first complicated aran pattern that she had tried in quite a while so was out of practice. Anyway, I kept on doing a bit here and there but other things kept on getting in the way and as they were easier to do, her jacket kept on getting put to the back of the pile of things to do. It was really nice to get it finished and she is thrilled with it. I started it for her in August and managed to finish it just over a week ago. The weather is still cold and horrible so it is perfect to keep her warm.

The other UFO that I have managed to get completed is an A3 size cross stitch that I started about 10 months ago. It is of a beautiful black cat sat on a fence post in the snow. It was meant to have lots of French knots for the falling snow but my knots are not always the neatest so I decided to sew on white seed beads instead. I am really pleased with the result and am now getting it framed so it can go up with the others.

Two projects that have been on the go for several months have been ticked off the list. The only problem though with completing a project is that it gives you plenty of excuses/reasons to start another one, or two, or three, or ......................................

We never do quite complete all of our UFO's do we.

Monday, 6 February 2017

Mini hats

So, I have been continuing to knit the mini hats for Age Uk. I have so far completed 128 of them. They have all been sewn up but not all of them have had an embellishment yet. I either do a pom-pom or a button depending on what I feel like at the time. Sometimes they do even get both! Most of the little hats I have done with the pattern that my sister uses which is garter stitch for the brim part and then stocking stitch for the main. Having done so many of them you can see why I say I can do these off by heart and without even needing to watch what I am doing as it is so simple! Recently though, I thought I would try and see what they would look like if they had a rib pattern which meant adapting the number of stitches and rows. So far I have done a few with both a one by one rib and a couple with the 2 by 2 rib. I am pretty pleased with the results.
I know these ones are for the charity but I couldn't resist playing around with what other ways I could use these little mini hats. For Christmas ( I know, the dreaded C word!) I made a dozen red ones with white fluffy brim and strung them together to go with a string of fairy lights as little mini Santa hats. I forgot to take a photo though when they were strung up. Oops. Next time. I have also tried them as mini bag charms, attaching ribbon and a key ring.  I want to play around with these. Sizes, embellishment and maybe even LED's who knows where it will lead. Watch this space :)